# How to Build an AI Chatbot
Note
To make it easier to flick back and forth, it's often useful to click the link to this doc and open in a new tab.
# Overview
This guide covers how to create an AI Chatbot designed to answer questions about a set of documents. The Chatbot uses OpenAI's GPT models to answer users' questions, querying the documents in order to find the information required to produce answers that are informative and accurate.
The Chatbot must be able to:
- Understand what a question is about.
- Find the information it needs to answer the question.
- Not invent information: if it can't answer based on the documentation, then it should not answer.
As a demonstration, we will create a Chatbot called Paul Graham Bot that can answer user questions about the essays of Paul Graham (opens new window), a computer scientist and founder of Y Combinator.
PRE-REQUISITIES
This tutorial assumes that you are using:
- OpenAI. You will require an API key (click here (opens new window)).
- Kortical SDK. Refer to the Kortical SDK documentation setup page, which details a range of installation methods depending on your operating system and preferences.
# Creating The App and Project
The steps below show how to create the app from a template and setup the project using the Kortical platform. It mimics the steps in this section of the ML Ops - Deployment How to Guide. For clarity, some of the details are not repeated here.
# 1. Create a codebase for your app.
Create the app, selecting the OpenAI LLM template:
> kortical app create <your_chatbot_project_name>
Available app templates:

	[1] web_app_template
	[2] openai_llm_template
	[3] bigquery_app_template
	[4] excel_app_template
	[5] automation_template

Please select a template index:
> 2

Retrieving template openai_llm_template to current working directory. Path to template project will be /Users/owen-saldanha/git/test_apps/<your_chatbot_project_name>
Created [openai_llm_template] template for [<your_chatbot_project_name>] at /Users/owen-saldanha/git/test_apps/<your_chatbot_project_name>
This will create a folder with the specified app name; by default, this will be in your current directory.
# 2. Create a virtual environment for the app.
Although you may have already created a venv for running the Kortical package, the requirements for your app may clash with your currently installed libraries. It is strongly recommended to create a new venv for each app folder that is created, so running code locally is quick and easy.
Deactivate your current environment and enter the app directory. Then create a python 3.9 venv and install the requirements:
> cd <your_chatbot_project_name>
> which python3.9
> <path-to-python3.9>/python3.9 -m venv app-venv
> source app-venv/bin/activate
> cd <your_chatbot_project_name>
> where python3.9
> <path-to-python3.9>/python3.9 -m venv app-venv
> copy "app-venv\Scripts\python.exe" "app-venv\Scripts\python3.exe"
> app-venv\Scripts\activate.bat
// Make sure to add code blocks to your code group
This will create a venv called app-venv, to create a venv with a different name change the last parameter.
Note
All further steps assume that we’re in the app directory and have it's venv activated. To activate a venv: source <path-to-venv>/bin/activate, to exit a venv: deactivate.
# 3. Create a Kortical project.
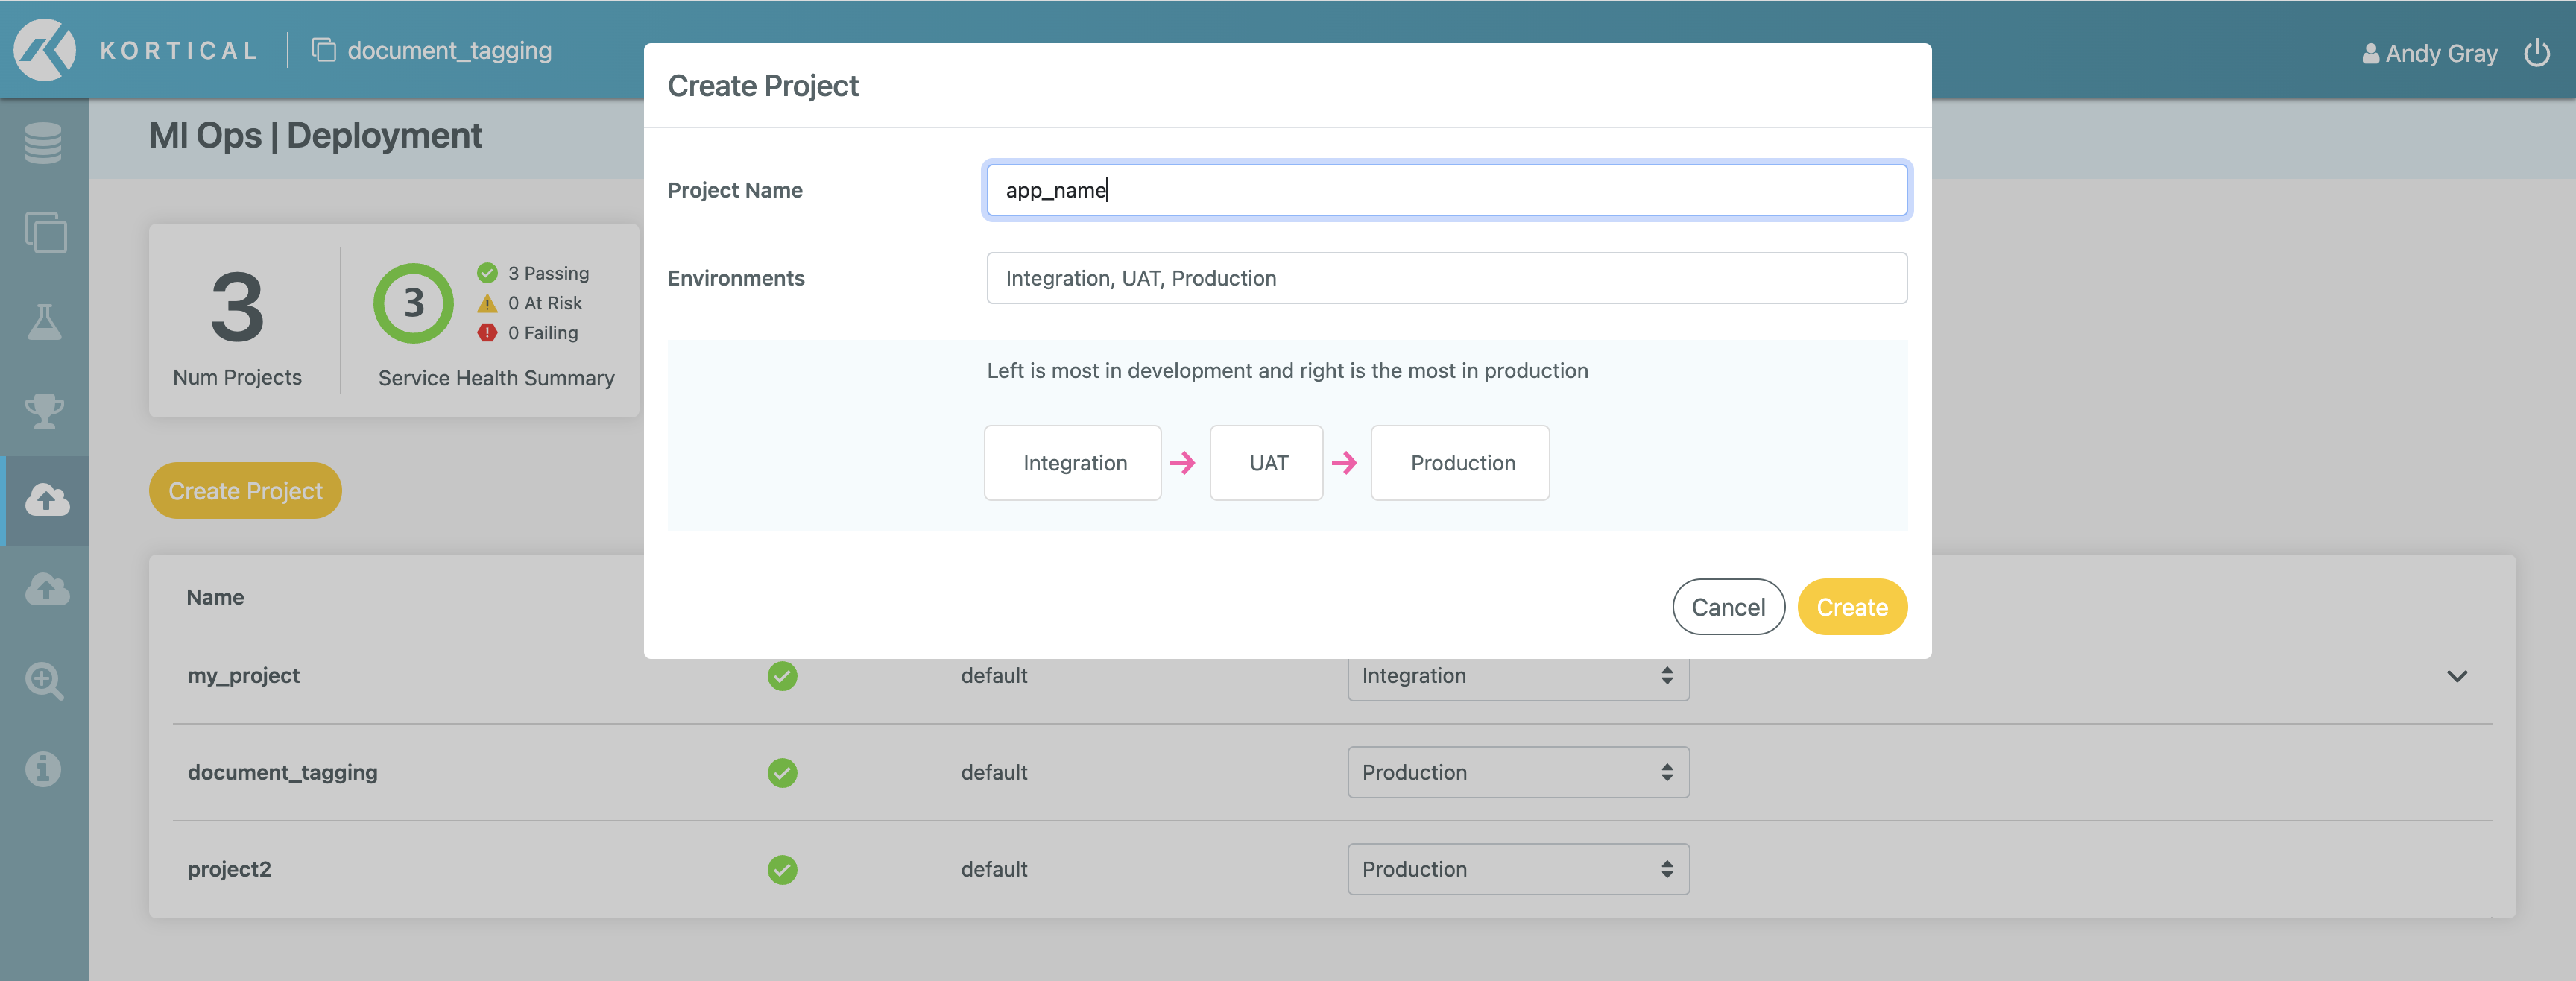
Navigate to the MLOps | Deployment screen in the platform and click Create Project, then enter the app name or another project name:
# 4. Select the project.
We’re going to initialise Kortical again. Doing this for each app imitates the git/github pattern so it is easy to switch between projects. As the state for selected system, project and environment are all held in here:
> kortical config init
Select the project (if unsure, run kortical project list to view all projects):
> kortical project select your_chatbot_project_name
Project [your_chatbot_project_name] selected.
+----+---------------------------+----------------------------+
| id |   name                    |          created           |
+====+==========+================+============================+
| 4  | your_chatbot_project_name | 2023-01-22 14:48:24.201360 |
+----+---------------------------+----------------------------+
Environments in project [your_chatbot_project_name]:
+----+-------------+----------------------------+--------------------------------------------+----------------------------+
| id |    name     |          created           |         project                            | promotes_to_environment_id |
+====+=============+============================+============================================+============================+
| 64 | Integration | 2023-01-22 14:48:24.317583 | id [4], name [your_chatbot_project_name]   | 63                         |
+----+-------------+----------------------------+--------------------------------------------+----------------------------+
| 63 | UAT         | 2023-01-22 14:48:24.280797 | id [4], name [your_chatbot_project_name]   | 62                         |
+----+-------------+----------------------------+--------------------------------------------+----------------------------+
| 62 | Production  | 2023-01-22 14:48:24.237302 | id [4], name [your_chatbot_project_name]   | None                       |
+----+-------------+----------------------------+--------------------------------------------+----------------------------+
Environment [Integration] selected.
+----+-------------+----------------------------+--------------------------------------------+----------------------------+
| id |    name     |          created           |         project                            | promotes_to_environment_id |
+====+=============+============================+============================================+============================+
| 64 | Integration | 2023-01-22 14:48:24.317583 | id [4], name [your_chatbot_project_name]   | 63                         |
+----+-------------+----------------------------+--------------------------------------------+----------------------------+
As a result of doing kortical config init for this folder, this will not affect other repositories which have a different project selected. Selecting a project will also automatically select the first environment within that project.
# Deploying the Chatbot App and Chatbot Model
This example consists of two parts: the Chatbot App and the Chatbot Model.
We will look at deploying the Chatbot App first, and then at customizing the underlying Chatbot Model.
# 1. Deploy the app.
First, let's set an api_key to protect access to our app. This is the API key that users will need to pass in to access the app’s endpoints, using a url like:
https://platform.kortical.com/<company>/<system>/api/v1/projects/your_chatbot_project_name/environments/<environment-name>/apps/<your_chatbot_project_name>/<endpoint>?api_key=<api_key>
This should be something that's hard to guess. One way to create it is to:
- go to https://www.guidgenerator.com/online-guid-generator.aspx (opens new window),
- click
Generate some GUIDS!, - click
Copy to Clipboard, and - paste it into the
config/app_config.yml.
The api_key is then set in the app config, found at config/app_config.yml. Here is an example for Paul Graham Bot.
documents_file_name: "PaulGrahamEssays.csv"
embeddings_file_name: "PaulGrahamEssaysEmbeddings.json"
api_key: <your-app-api-key>
openai_api_key: <your-openai-api-key>
output_temperature: 0.0
output_max_tokens: 500
logo_image_url: 'static/images/k-logo.svg'
app_title: 'Paul Graham Bot'
bot_name: 'Paul Graham Bot'
bot_task: "help users understand and explore Paul Graham's essays"
Replace <your-app-api-key> with the api_key you generated.
Note
This is distinct from your OpenAI api_key, which should replace <your-openai-api-key>.
Deploying the app at this point is very straightforward:
> kortical app deploy
Note
On MacOS/Linux, you may need to start a SSH agent; to do this, run eval $(ssh-agent).
This will take a while to build the first time, however the Dockerfile is structured such that subsequent deployments for code changes should be very fast.
Once the deploy command has finished, we’ll see some output like:
Waiting for status [Running] on component instance: project [5], environment [69], component_instance_id [164]
Deployed Kortical Cloud app [<your_chatbot_project_name>].
If it is a webservice it will be accessible at:

https://platform.kortical.com/<company>/<system>/api/v1/projects/your_chatbot_project_name/environments/<environment-name>/apps/<your_chatbot_project_name>/

Deployment of [<your_chatbot_project_name>] has been completed!
Copy the whole link (including the trailing slash) from your CLI and paste it into your browser to see the app. Remember to attach the API key or you’ll see a 401 unauthorized request. If it says default backend, keep refreshing as it can take a minute or two to come online.
# 2. The Chatbot model.
The Chatbot model uses OpenAI's GPT LLMs to understand questions, find information and to produce answers to questions. The model code is stored in:
src/<chatbot-project>/question_answering/langchain_answer.py
It can be customized in two ways:
a. Basic customization.
For basic customization, you can update config/app_config.yml. This contains the following keys that can be used to customize the chatbot:
documents_file_name: A csv file containing the documents to query in order to answer questions. Each row contains a section of documentation. Large sections should be split into multiple chunks and have their own row.- This should have the following column.
content: the content of the documentation section.
- The following columns are optional:
title: the name for the documentation section, e.g. the document or section header.link: a link to the documentation section, e.g. a url. If this is present, the Chatbot can point the user to the section.
- This should have the following column.
embeddings_file_name: A json file containing the embeddings for the documents indocuments_file_name. This should be a dictionary of key-value pairs, where the keys correspond to the indices indocuments_file_name, and the values are the embeddings for that document, as a list. See the filePaulGrahamEssaysEmbeddings.jsonfor an example.bot_name: The name of your chatbot. This will be used by the Chatbot when asked about what it is.bot_task: The task of your chatbot. This will be used by the Chatbot when asked about its task.
See the example above for Paul Graham Bot.
b. Advanced customization.
Further customization is possible by changing the prompts used by the Chatbot to answer questions or even to the model itself.
src/<your_chatbot_project_name>/question_answering/prompts.py: Prompts used to answer questions.src/<your_chatbot_project_name>/question_answering/langchain_answer.py: The AI model.src/<your_chatbot_project_name>/question_answering/utils.py: Utils for loading documents.
Advanced customization is beyond the scope of this guide.
# Testing the Chatbot App and Chatbot Model
Testing your chatbot is similar to testing the webapp in the ML Ops - Deployment How to guide. The tests have two functions:
Testing that the Chatbot App is correctly deployed. See
test_api.pyandtest_functionality.pyfor these tests.Testing that the Chatbot Model is giving expected output. See
test_langchain_answer.pyfor testing the model. This runs the Chatbot Model on a set of questions, and compares the output to some expected output. This ensures that the Chatbot is behaving as we would expect.
To run all tests, navigate to the root folder of the Chatbot repo and run:
> pytest tests/